[Guide] Build a budget VPN with AWS Lightsail and Wireguard
What is Wireguard? According to their page, they states:
![[Guide] Build a budget VPN with AWS Lightsail and Wireguard](/content/images/size/w2000/2025/03/1-ull9da1e9ioincysrhdeua.png)
What is Wireguard? According to their page, they states:
“WireGuard® is an extremely simple yet fast and modern VPN that utilizes state-of-the-art cryptography. It aims to be faster, simpler, leaner, and more useful than IPsec, while avoiding the massive headache. It intends to be considerably more performant than OpenVPN. WireGuard is designed as a general purpose VPN for running on embedded interfaces and super computers alike, fit for many different circumstances. Initially released for the Linux kernel, it is now cross-platform (Windows, macOS, BSD, iOS, Android) and widely deployable. It is currently under heavy development, but already it might be regarded as the most secure, easiest to use, and simplest VPN solution in the industry.”
I’ve been using it for about a year now and it’s very fast and lightweight indeed.
My use case was quite odd when i came to WireGuard, i was finding a way to bypass Internet Censorship in my country. Unfortunately, Medium was one of those restricted sites in my country.
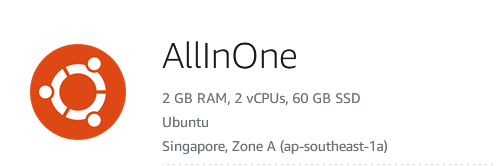
Let’s put the politics aside. First, i rented a Ubuntu VPS on AWS located outside of my country. Lightsail was a good choice because it provides a machine which is strong enough and cheap enough for me to effort. It has 2 GB of RAM, 2 vCPUs and 60GB SSD. It costs me only $10 a month. In my case, i also use it for other purposes, if Lightsail is the only thing you use, you should choose the $3.5 plan which is cheaper and more than strong enough for Lightsail hosting.
Server side configuration (Ubuntu)
Installing Wireguard
First, we can install Wireguard by using the following commands
sudo apt update
sudo apt install wireguard
Generating public and private key
After that, we have to generate private key and public key for Wireguard asymmetric validation.
First, for the private key we will use the following commands
wg genkey | sudo tee /etc/wireguard/private.key
sudo chmod go= /etc/wireguard/private.key
And this command for public key, note that we generate the public key using the private key from the last step here.
sudo cat /etc/wireguard/private.key | wg pubkey | sudo tee /etc/wireguard/public.keyFind the public network interface
ip route list defaultMy terminal output, it could be different on your machienens5
dev ens5 proto dhcp src xxx.xxx.xxx.xxx metric 100
Creating the wg0.conf configuration file
In order to config Wireguard, we will have to create the configuration file using this command
sudo nano /etc/wireguard/wg0.confThen, we will modify the content in the wg0.conf file
Inside the wg0.conf file, we define the configuration for the server and client (peer). We will leave the [Peer] section for now and come back later when we finished the configuration for the Client
[Interface]
Address = 10.8.0.1/24
SaveConfig = true
PostUp = ufw route allow in on wg0 out on ens5
PostUp = iptables -t nat -I POSTROUTING -o ens5 -j MASQUERADE
PostUp = ip6tables -t nat -I POSTROUTING -o ens5 -j MASQUERADE
PreDown = ufw route delete allow in on wg0 out on ens5
PreDown = iptables -t nat -D POSTROUTING -o ens5 -j MASQUERADE
PreDown = ip6tables -t nat -D POSTROUTING -o ens5 -j MASQUERADE
ListenPort = 51820
PrivateKey = Your Secret created in previous step

[Peer]
PublicKey = Peer public key
AllowedIPs = 10.8.0.2/32

[Peer]
PublicKey = Peer public key
AllowedIPs = 10.8.0.3/32
The [Interface] sections defines the Server’s configuration and the [Peer] section defines the section that belongs to the client.
Adjusting the server network configuration
Use your favorite text editor to edit the /etc/sysctl.conf. Mine is vim, so i use this command sudo vim /etc/sysctl.conf
We only need to un-comment these lines by removing # at the beginning of these lines
net.ipv4.ip_forward=1
net.ipv6.conf.all.forwarding=1
Firewall
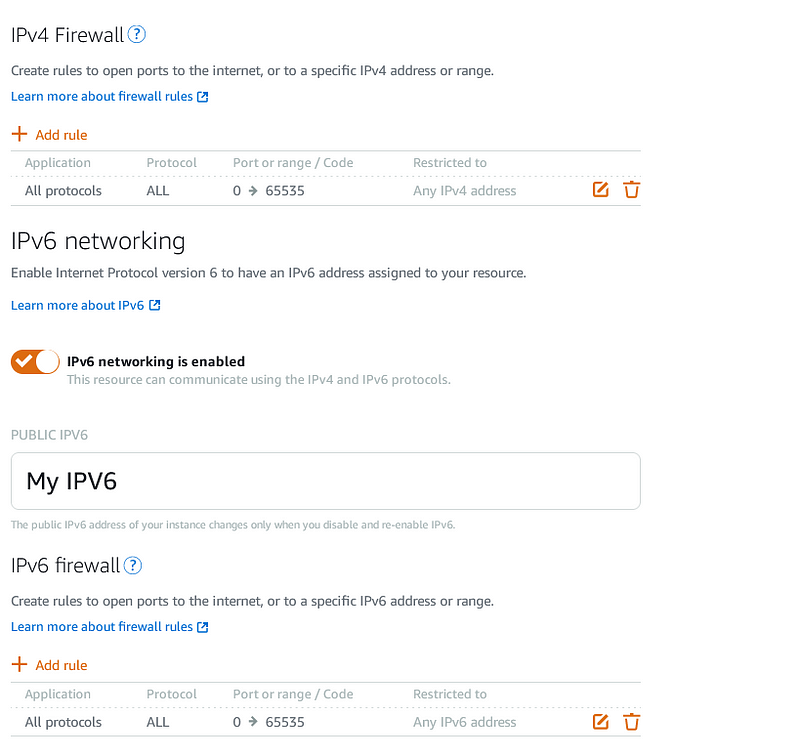
From the Lightsail dashboard, we switch to Network tab and add Firewall rule for our machine. In my case, i allow all ports for both IPv4 and IPv6 for purposes other than VPN. You should allow only port 51820here if Wireguard is the only inbound connection you have.
Beside the Lightsail firewall, you will have to adjust the firewall rule in your Ubuntu instance using these commands
sudo ufw allow 51820/udp
sudo ufw allow OpenSSH
After that, we will start the Wireguard service
sudo systemctl enable [email protected]
sudo systemctl start [email protected]
Configure Wireguard client
In my use case, i use Windows as Wireguard Client. First, we go to this link to download the installation.
After finish installing Wireguard and opened Wireguard, we right-click the empty panel in the Tunnels tab and select “Add empty tunnel…”
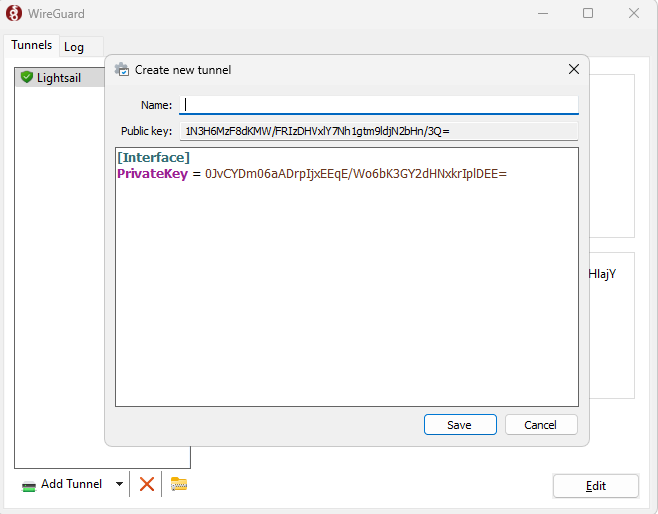
The good thing with this UI approach is that it automatically creates the public key and private key for us.
The [Interface] is the configuration on your Client and the [Peer] section is the Configuration for the Server, the [Peer] and [Interface] is reversed with the configuration of the server
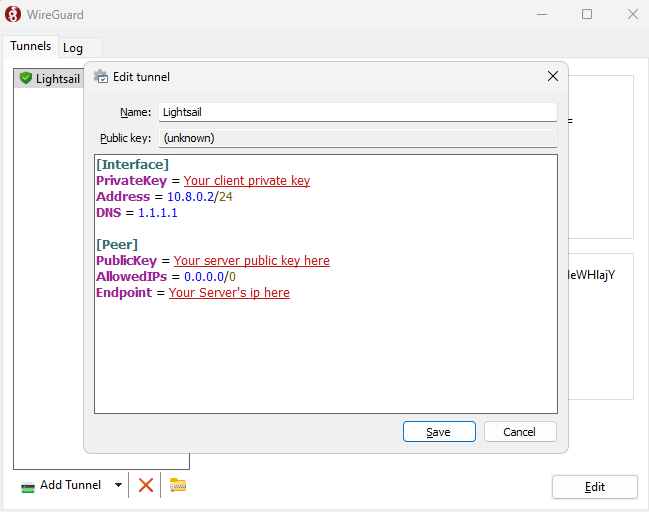
[Interface]
PrivateKey = Your client private key
Address = 10.8.0.2/24
DNS = 1.1.1.1

[Peer]
PublicKey = Your server public key
AllowedIPs = 0.0.0.0/0
Endpoint = Your server ip and port, for example 1.1.1.1:51820
That’s all for the client. However, in order to make it work, we have to configure the [Peer] section in your Server’s configuration and restart the Wireguard service.
wg0.conf on your Ubuntu instance

[Peer]
PublicKey = Your client public key (Windows instance in my case)
Now, we can click Activate on the Client and verify your self hosted VPN.