[Guide] Setting up a VSCode that’s so good that you work overtime just so you can keep typing
The other day I’m casually scrolling through LinkedIn, minding my own business, when I stumble upon this post. This dude’s showing off his…
![[Guide] Setting up a VSCode that’s so good that you work overtime just so you can keep typing](/content/images/size/w2000/2025/03/1-t2j1xtg5fjnq_i3gsuy-xg.png)
The other day I’m casually scrolling through LinkedIn, minding my own business, when I stumble upon this post. This dude’s showing off his work, and I gotta say, it’s pretty impressive. But then, out of nowhere, this random guy drops a comment saying, ‘Your vscode look unprofessional.’ Say what? UnPr0FesSi0naL? Seriously?
But hey, guess what? The longer you stick around in this industry, the more you realize that plain old VSCode just doesn’t cut it. And seriously, who cares about that one dude in the comment section saying your VSCode looks unprofessional? Like, really? In this post, I’m gonna show you how to pimp out your IDE and make it the envy of your workplace. Get ready to rock your coding game with some seriously cool VSCode tweaks!
Let’s make the VSCode handsome (again)
The theme
I’ve opted for the ‘Dark Modern’ theme as my personal choice. It strikes a balance between being dark enough to provide a sleek appearance without being overly intense. The color contrast is just right, making it easy on the eyes during those long coding sessions. It’s a sophisticated and refined look that adds a touch of elegance to my coding environment.
The ‘Dark Modern’ theme was introduced as the default Dark theme in April 2023 with version 1.78 of VSCode. If you’re still rocking an older version, it’s high time for an upgrade. It’s almost June now, and you don’t want to be more than two months behind the rest of the crowd, do you?
The command pallette and the settings.json file
Before we move forward with the theme, let me introduce you to the Command Palette. You can easily access it by pressing the key combination of Ctrl+Shift+P. It’s a handy tool that allows you to execute commands and access various features with just a few keystrokes. Once you start using it, you’ll realize how convenient and time-saving it can be
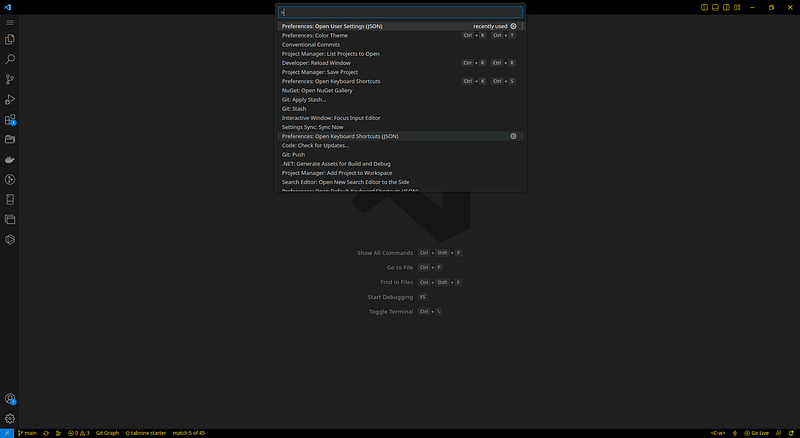
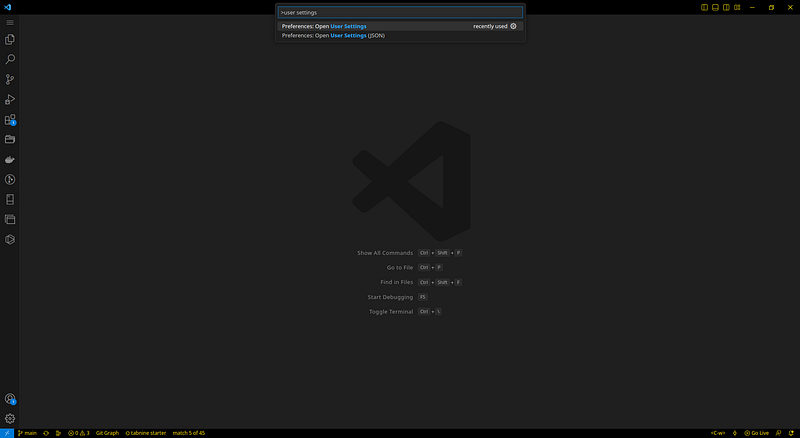
Once the Command Palette is displayed, simply type in “user settings” and you’ll see two options: “Preferences: User settings (Json)” and “Preferences: Open User Settings”. The first option allows you to edit all the settings using a JSON file, while the second option provides a graphical user interface (UI) for configuration. Personally, I find it quicker to use the JSON file instead of navigating through the UI. Choose whichever option suits you best based on your preference and comfort level with editing the settings.
The Font
FiraCode is an excellent choice. It’s a monospaced font that brings programming ligatures to the table, making your code look even more stylish and readable.
The font used in the Dark Modern theme is not only visually appealing but also easy on the eyes. Its low-contrast colors create a soothing and comfortable coding experience. Personally, I prefer low contrast colors as they help me maintain focus and avoid distractions. If you’d like to use the font, you can download it by following the instructions provided by the font’s creators.
My current setting for this is:
"editor.fontFamily": "'FiraCode NF', 'firaCode Nerd Font', 'Cascadia Code', Consolas, 'Courier New', monospace",
"editor.fontLigatures": true,
The menu
I hide the menu in VSCode for a cleaner interface and rely on shortcuts for quicker navigation and actions. Now the title bar is clean.
"window.menuBarVisibility": "compact"I find that the command in the center looks very cool and making it easier for me to identify the workspace i’m currently working on, especially when dealing with multiple workspaces.
"window.commandCenter": trueThe Minimap
To deal with the annoyance caused by the minimap, which distracts many people including myself, I have found a way to reclaim precious screen real estate without sacrificing its usefulness during certain tasks like refactoring. By tweaking the settings, I have configured the minimap to appear only when I hover my cursor over the rightmost part of the editor. This way, I have more space to focus on my code while still having the minimap readily accessible whenever I need it.
"editor.minimap.autohide": true,
 "editor.minimap.enabled": true,
 "editor.minimap.renderCharacters": false,
 "editor.minimap.scale": 1,
 "editor.minimap.showSlider": "mouseover",
 "editor.minimap.side": "right",
The minimap serves as a handy tool for quickly locating our position in the code. However, the excessive display of intricate characters could reduce the performance. I have opted to scale down the minimap to a value of 1.
The breadcrumbs
The breadcrumbs feature may have its aesthetic appeal, but I personally find it to be of little practical use. Therefore, I made the decision to disable it altogether.
"breadcrumbs.enabled": falseCursor style, cursor surrounding and gutter
Thin cursor is hard to find, the default coloring blends in the text while you are typing plain text.
"editor.cursorBlinking": "solid",
"editor.cursorSmoothCaretAnimation": "off",
"editor.cursorSurroundingLines": 10,
"editor.cursorSurroundingLinesStyle": "default",
"workbench.colorCustomizations": {
"editorCursor.background": "#ff930f",
 "editorCursor.foreground": "#ff930f",
}
Setting the background and foreground color to “#ff930f” makes the cursor stands out from the black theme and easier to find than your socks.
The “cursorSurroundingLines” setting is quite handy, especially when you’re navigating through a file using the arrow keys. It ensures that you have a 10-line offset while scrolling, which helps you maintain your position in the code.
Hovering delay
The default hovering delay is way too slow for a hustle person and needs to be changed as well:
"editor.hover.delay": 300,
  "workbench.hover.delay": 1,
Setting the editor hover delay to 300 milliseconds is a good choice for achieving a balance between responsiveness and usability. This delay allows you to quickly navigate through your code without triggering the hover unintentionally
Bracket pairs
In VSCode, there is a built-in feature called bracket pair highlighting that helps you easily identify matching pairs of brackets in your code. By enabling horizontal bracket pair highlighting, you can keep track of the corresponding opening and closing brackets as you scroll up and down your code.
Furthermore, rendering indentation and highlighting the active indentation can be beneficial when navigating through your code.
"editor.guides.bracketPairs": true,
  "editor.guides.bracketPairsHorizontal": "active",
  "editor.guides.highlightActiveBracketPair": true,
  "editor.guides.highlightActiveIndentation": true,
  "editor.guides.indentation": true,
  "editor.bracketPairColorization.enabled": true,
  "editor.bracketPairColorization.independentColorPoolPerBracketType": true,
Highlight occurrents
Enabling the highlighting of occurrences in your code can be extremely useful when debugging and reading through your code.
"editor.occurrencesHighlight": true,Coloring for background and foreground
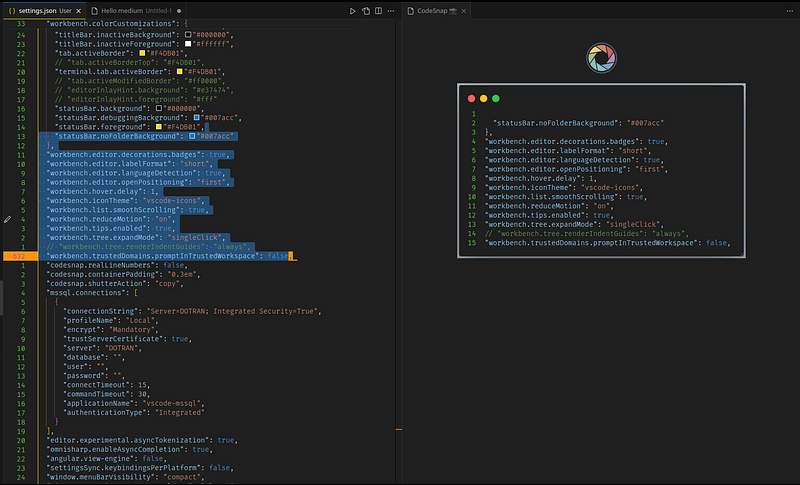
I also change coloring for other components, change it as you please
"workbench.colorCustomizations": {
    "editor.lineHighlightBackground": "#ff930f",
    "editor.lineHighlightBorder": "#9fced11f",
    "editorCursor.background": "#ff930f",
    "editorCursor.foreground": "#ff930f",
    "editorLineNumber.activeForeground": "#A020F0",
    "editorLineNumber.foreground": "#5DE23C",
    "titleBar.activeBackground": "#000000",
    "titleBar.activeForeground": "#F4DB01",
    "titleBar.inactiveBackground": "#000000",
    "titleBar.inactiveForeground": "#ffffff",
    "tab.activeBorder": "#F4DB01",
    "terminal.tab.activeBorder": "#F4DB01",
    "statusBar.background": "#000000",
    "statusBar.debuggingBackground": "#007acc",
    "statusBar.foreground": "#F4DB01",
    "statusBar.noFolderBackground": "#007acc"
}
Sticky scroll
I prioritize performance over fancy UI, so I disabled smooth scrolling in VSCode. Smooth scrolling can sometimes introduce unnecessary overhead, affecting the overall performance.
Additionally, I increased the fast scroll sensitivity, which allows me to navigate through the code faster when using the Alt key with the scroll wheel.
Furthermore, I find sticky scrolling particularly useful, especially when working with long files. It helps me maintain a sense of location and easily track my position, similar to how breadcrumbs work in navigation.
"workbench.list.smoothScrolling": true,
  "editor.fastScrollSensitivity": 5,
  "editor.smoothScrolling": false,
  "editor.stickyScroll.enabled": true,
Icons
The vscode-icons is really good and sharp enough.
Vim key binding
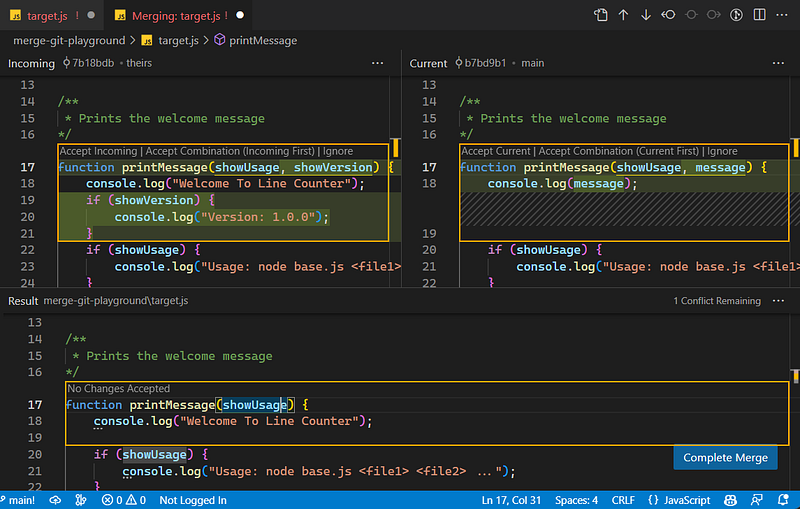
You wanna be the fastest hand in the west? use vim keybinding. Maybe you are asking “why don’t you use vim instead so you could be as fast as the Flash?”. The answer is very simple, vim is extremely good at doing stuff without the mouse, but i find that there are stuff that can be done better using an interactive UI, like git conflict resolve. Moreover, the configuration in vim is scary for newcomer like me.
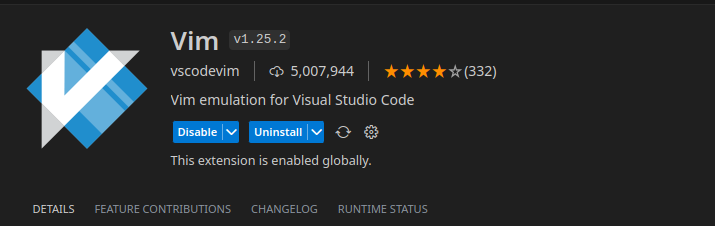
Let’s install vim extension
Quick introduction
Before we get started, it’s helpful to have a basic understanding of Vim and its extension for Visual Studio Code. Take a quick look at the Vim introduction and extension documentation to familiarize yourself with the concepts.
In Vim, there are three main modes: normal mode, insert mode, and visual mode. The status bar conveniently displays the current mode, allowing you to easily keep track of your editing state. These three modes are the ones you’ll be using the most while working in Vim.
- Insert Mode: For inserting.
- Normal mode: For modifying
- Visual Mode: For selecting.
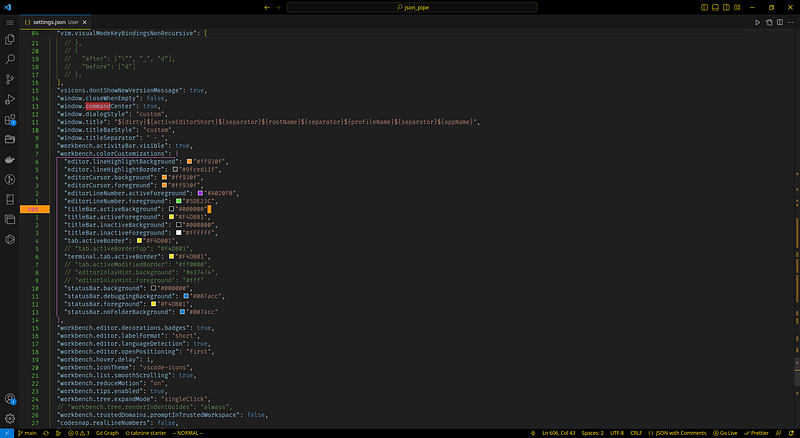
Keymapping in settings.json
First, we map the leader key to space. You can think of it like ⌘ in MacOS.
"vim.leader": "<space>",Key mappings in Vim are configured in the settings.json file using arrays for each mode.
"vim.visualModeKeyBindings": [],
"vim.visualModeKeyBindingsNonRecursive": [],
"vim.insertModeKeyBindings": [],
"vim.insertModeKeyBindings": [],
"vim.normalModeKeyBindingsNonRecursive": []
For example, if i want to press ‘tt’ close all the opening tab using normal mode, i add this to the normalModeKeyBindingNonrecursive section
{
  "before": ["t", "t"],
  "commands": ["workbench.action.closeEditorsInGroup"]
}
Or if you want to indent, instead of pressing tab, you can map it to >, you can do it like this
{
  "before": [">"],
  "commands": ["editor.action.indentLines"]
},
Keymapping in keybindings.json
To eliminate the need for arrow keys, we can create custom key mappings in the keybindings.json file. You can access this file by opening the command palette and searching for “keyboard shortcuts”.
For example, if we want to press ctrl+j and ctrl+k in the code actions instead of arrow down and arrow up button, we can do this:
{
    "key": "ctrl+j",
    "command": "workbench.action.quickOpenSelectNext",
    "when": "!textInputFocus && inQuickOpen"
  },
  {
    "key": "ctrl+k",
    "command": "workbench.action.quickOpenSelectPrevious",
    "when": "!textInputFocus && inQuickOpen"
  },
I also found that a shortcut for Toggling Terminal could be handy. \\ is json string escape for “\”. You only need to press Ctrl+\ in this case.
{
"key": "ctrl+\\",
"command": "workbench.action.terminal.toggleTerminal",
"when": "terminal.active"
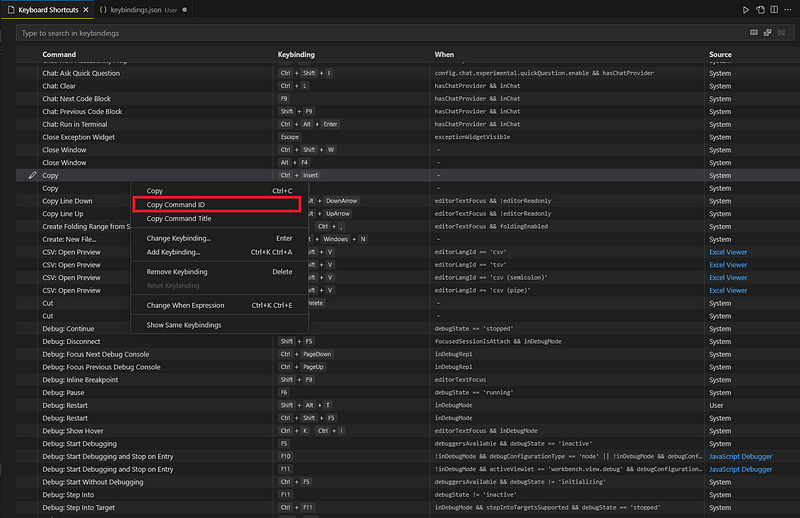
},If you wish to add a new keybinding to an existing one but are unsure of the command ID, you can utilize the Key Binding UI and simply copy the command ID from there.
You can also remove key binding by using the option “Remove key binding” on UI or by adding “-” before the command.
{
    "key": "ctrl+u",
    "command": "-cursorUndo"
  }
I have put all mysettings.jsonandkeybindings.jsonthat contains so much more key mappings on Github here.
Easymotion
When using Vim, you can move around using jkhl instead of arrow keys. But for even faster navigation, you can try the EasyMotion extension. It provides advanced movement options and shortcuts to quickly jump to specific locations in your code
By pressing “Leader Leader s” + “the char you want to jump to” to could reduce a lot of repetitive key pressing.
For example, to jump to a specific “c” on the screen using EasyMotion, you can press the leader key twice followed by “s” and then “c”. Keep in mind that if there are multiple occurrences of “c” on the screen, you may need to press additional keys to specify which occurrence you want to jump to.
Utilities
Drag and drop
If you want to disable the touchpad on your laptop to avoid accidental dragging and dropping while typing, you can usually do so through the touchpad settings in your operating system.
"editor.dragAndDrop": false,Word wrap
Long line is a sign of code smell, we also use the mouse for quick navigating within a long line. But, we are trying to avoid using the mouse and additional movement here.
Luckily, there’s an option to wrap long line to avoid scrolling
"editor.wordWrap": "on"Code lens
Code Lens can be useful for quick action like Debug and Run Test while scrolling around. It could be useful sometimes
"editor.codeLens": trueFormat on paste and on save
Enabling the automatic formatting feature in the editor can save you the hassle of manually formatting your code. By configuring it to trigger on file save or when pasting text, you can ensure that your code is consistently formatted without the need for extra keystrokes.
"editor.formatOnPaste": true,
  "editor.formatOnSave": true,
  "editor.formatOnType": false,
promptInTrustedWorkspace
When working on your local machine and you simply want to open an empty folder for quick experimentation or note-taking, the workspace trust prompt can become a bit bothersome. While it serves a purpose for remote workspaces and specific scenarios, you might find it unnecessary for your regular local projects. Fortunately, you can disable the workspace trust prompt and have a smoother workflow without interruptions.
"security.workspace.trust.banner": "never",
"security.workspace.trust.emptyWindow": true,
"security.workspace.trust.enabled": false,
"security.workspace.trust.startupPrompt": "never",
Extensions
There are some extensions that could be useful here
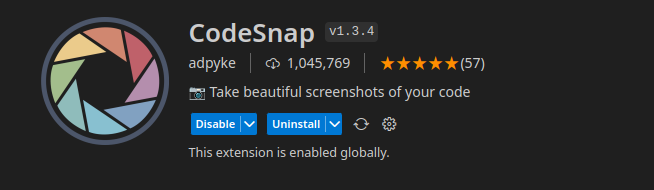
Codesnap lets you create a picture of your code
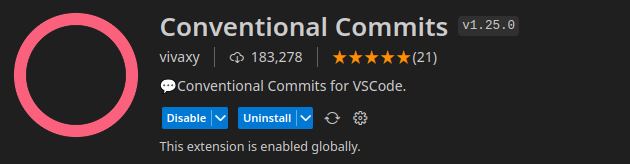
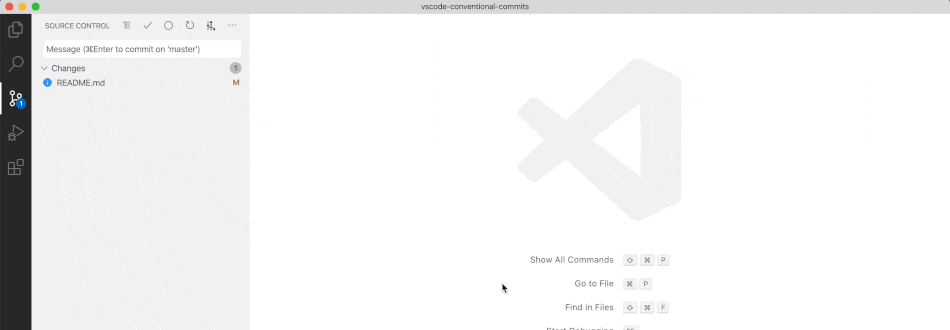
Conventional Commits lets you do a git commit with a predefined structure.
Diff lets you compare 2 text files
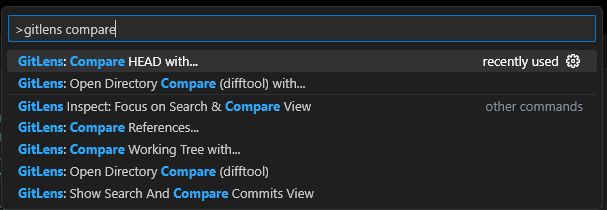
Thanks Cardin for pointing out that VsCode has built-in Compare features which let you do the same. Furthermore, GitLens extensions below also let us compare the current commit with previous commit as well.
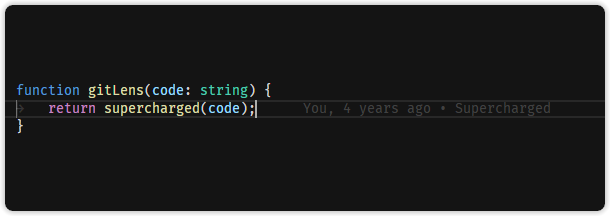
Markdown linting and Markdown preview could be helpful while writing markdown documentation.

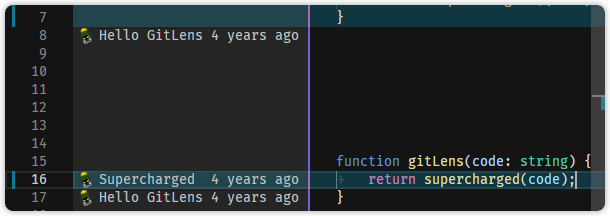
GitLens does not sponsor this post, but their free tier is enough for me to use.

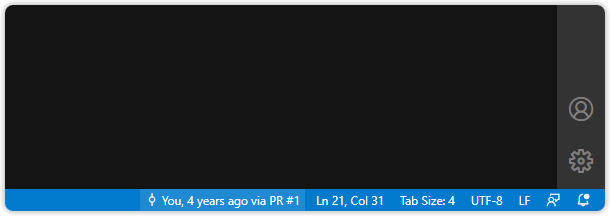
Error lens
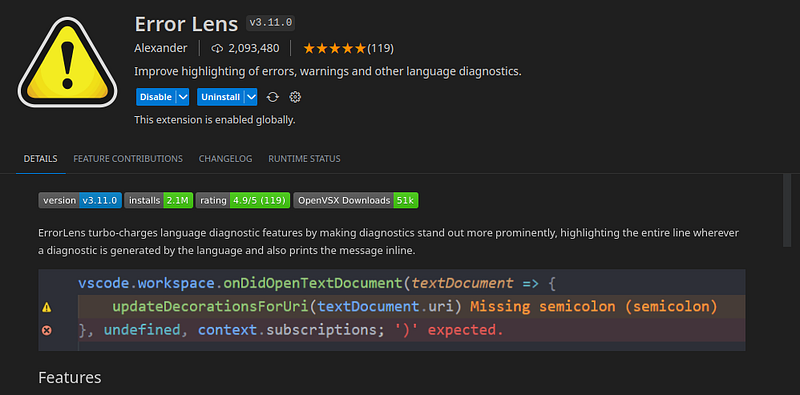
Error Lens gives you a better UI/UX than the default error decoration in VSCode.
If you find the post useful, consider buying me a coffee.
Update: I’ve created a github repo and uploaded my configurations here.