TailwindCss With .NET 8 Integration
I wanted to push myself and learn something new, so I decided to tackle some npm tasks from the ground up.

TailwindCSS With .NET 8 Seamless Integration Guide
Tailwind CSS has a unique aesthetic that can be perceived as both edgy and attractive at the same time. It has gained significant popularity in recent years. In this post, I will show you how to integrate it with the well-known .NET 8 Razor Pages (MVC framework).
For those unfamiliar with Tailwind CSS, I’ll provide a brief introduction in this section. If you’re already acquainted with it, feel free to skip ahead to the next section.
According to the generic definition from their official documentation. TailwindCSS is an open source CSS framework. The main feature of this library is that, unlike other CSS frameworks like Bootstrap, it does not provide a series of predefined classes for elements such as buttons or tables.
In other words, working with Tailwind CSS is quite straightforward. We add classes defined in their documentation to achieve the desired styling. For example, to make the text within a <p> tag red, we simply add the class “text-red-800” to the tag, similar to how we would use Bootstrap. However, the underlying mechanisms differ significantly from Bootstrap.
<!--Tailwind css, this would produce red text-->
<p class="text-red-800">Hello</p>
<!--Bootstrap css, this would produce green text -->
<p class="text-success">Hello</p>
Tailwind CSS works by scanning all of your HTML files, JavaScript components, and any other templates for class names, generating the corresponding styles and then writing them to a static CSS file.
The main difference is that TailwindCSS scans all your files and only writes the CSS that you actually use, rather than importing a pre-written CSS stylesheet into your web page.
Integration
Before delving into the integration, we’ll also need npm to install and run TailwindCSS. However, it’s only required as a development dependency, not for production deployment. This is due to Tailwind CSS’s unique workflow: we only need the library to scan our source code for custom styling when we make changes. When deploying to the production environment, we simply copy the generated CSS file along with our compiled code.
First, let’s create an MVC project using the following command line:
dotnet new mvc --output tailwind-integrationTailwind-integration is your project name, you can replace it by anything you like.
Then, we can install TailwindCSS using the following command
npm init -y
npm install -D tailwindcss
Note the -D flag, which indicates that we only need Tailwind CSS in our development environment. You can verify this in your package.json file.
{
  "name": "tailwindnet8",
  "version": "1.0.0",
  "description": "",
  "main": "index.js",
  "scripts": {
    "css:build": "npx tailwindcss -i ./wwwroot/css/site.css -o ./wwwroot/css/output.css",
    "test": "echo \"Error: no test specified\" && exit 1"
  },
  "keywords": [],
  "author": "",
  "license": "ISC",
  "devDependencies": {
    "tailwindcss": "^3.4.1"
  }
}
I’ve added a build script named css:build within the scripts section of the csproj file. This script initiates the Tailwind CSS scanning process, leading to the generation of the CSS file for our project. It will also take all the CSS styles from site.css as input and output them to output.css.
We’ll also need to incorporate some code into site.css. This will encompass all the essential CSS elements required for the proper functioning of output.css.
@tailwind base;
@tailwind components;
@tailwind utilities;
...
Next, we will run the following command to initialize our Tailwind CSS configuration:
npx tailwindcss initAfter running this command, we’ll see a new file named tailwind.config.js appear in our project directory. Unlike package.json, we'll need to make some modifications to this file to customize Tailwind CSS for our project.
/** @type {import('tailwindcss').Config} */
module.exports = {
  content: ["./Views/**/*.cshtml", "./Views/*.cshtml"],
  theme: {
    extend: {},
  },
  plugins: [],
};
The content array is initially empty after running the command. However, I've made modifications to instruct Tailwind CSS to scan all files within the Views folder and match specific patterns to generate the desired CSS styles. If your files reside in a different location, you'll need to adjust the content array accordingly.
We’re halfway done! Let’s now shift our focus to making some adjustments to the csproj file. As you may recall from the previous section, Tailwind CSS scans our project files and generates corresponding CSS content. The purpose of updating the csproj file is to ensure that every time we build the project, .NET will automatically trigger Tailwind CSS to perform this scanning and CSS generation process beforehand.
<Project Sdk="Microsoft.NET.Sdk.Web">

  <PropertyGroup>
    <TargetFramework>net8.0</TargetFramework>
    <Nullable>enable</Nullable>
    <ImplicitUsings>enable</ImplicitUsings>
  </PropertyGroup>

  <ItemGroup>
    <UpToDateCheckBuilt Include="wwwroot/css/site.css" Set="Css" />
    <UpToDateCheckBuilt Include="tailwind.config.js" Set="Css" />
  </ItemGroup>

  <Target Name="Tailwind" BeforeTargets="Build">
    <Exec Command="npm run css:build" />
  </Target>

</Project>
By incorporating these lines, we instruct the compiler to execute the command npm run css:build (the script we previously added) before proceeding to build the MVC project itself.
Now, let’s move on to modifying our Index.cshtm and Layout.cshtml file and then run the project to verify that everything functions as anticipated.
In Layout.cshtml, we simple add the output.css to use it. I deleted all the unnecessary part so that you could follow easily
<!DOCTYPE html>
<html lang="en">

<head>
    <meta charset="utf-8" />
    <meta name="viewport" content="width=device-width, initial-scale=1.0" />
    <title>@ViewData["Title"] - tailwindnet8</title>
    <link rel="stylesheet" href="~/css/output.css" />
</head>

<body>
    @RenderBody()
</body>

</html>
Once the necessary setup is complete, we can seamlessly integrate Tailwind CSS classes into our Index.cshtml file, as shown in this example
@{
    ViewData["Title"] = "Home Page";
}

<p class="text-red-800">Hello, This is Tailwindcss & .NET 8</p>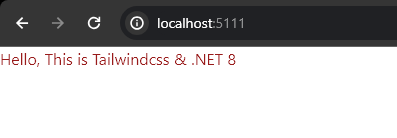
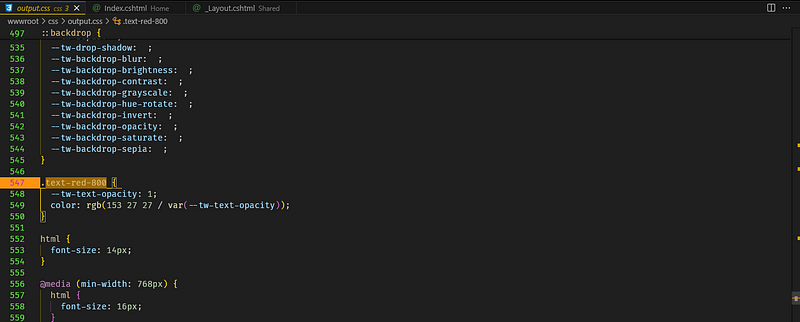
If you were to inspect the output.css file, you would find the .text-red-800 class and its corresponding styling within the file’s content.
However, it’s important to acknowledge that there are some trade-offs involved. This approach will add some overhead to your development process and make your application startup slightly slower than usual. While you could opt to manually run the Tailwind build command, doing so would essentially undermine the benefits of automation in programming.
That’s it for this post! I hope that we’ve learned some basics of Tailwind CSS and how to integrate it into your .NET project. The source code is published on GitHub here. If you have any questions, please don’t hesitate to comment in this post or create an issue on my GitHub repo.